Milk Bottle Lanterns

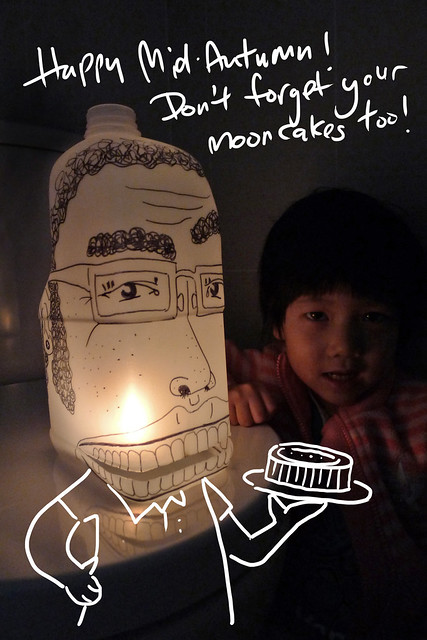
Mid-Autumn Festival is just a few days away.
To Pinkxi, it’s a very special day as she gets to celebrate it with ‘bites’ of mooncakes (cos it’s deliciously sweet and one shouldn’t have too much of this ‘sometime’ food….so says BBM…*nomnomnom*) and rounds of lantern parades around the neighbourhood. For BBM, Mid-Autumn Festival or 中秋节 (zhōngqiū jié, a traditional harvest festival in some East Asian countries) is also another reason to meet up with friends and connect with love ones, especially those who live far far away.
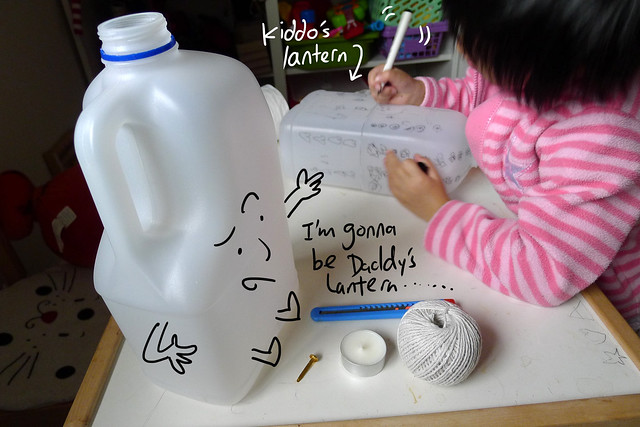
Thus the DIY Toys for the week are aptly LANTERNs, and they can be simply made out of recycled 3L milk bottles. BBM and Pinkxi will be making a different design each. Pinkxi gets to do one with a battery-operated torch and BBM does a candle-lit design.
Have fun and if you do get round to make your own lantern, please do share them on BBM’s Facebook Page as well! Happy Mid-Autumn Festival folks!
What you need are:
- colour markers (alcohol-based, permanent types so colours won’t get smudged)
- 3L milk bottles (thoroughly rinsed and dried)
- craft knife
- brass fastener
- tea candle (BBM’s lantern)
- hand-held battery-operated torch (Pinkxi’s lantern)
- twine (optional)
- chopstick (optional)
Instructions:
1. Pinkxi’s Lantern
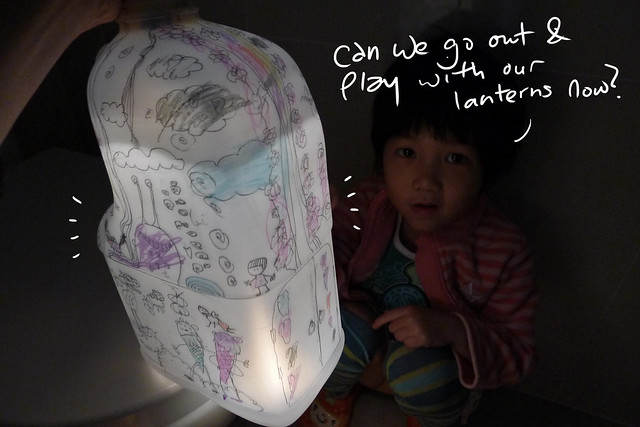
- Get kiddo to think about how the lantern should be decorated. There’s a gazillion way to do it though one should really not stick too much opaque colour paper on it as it’d block the glow. Pinkxi had used the markers to draw and colour a “mise-en-scène” of a magic garden and all it’s inhabitants.
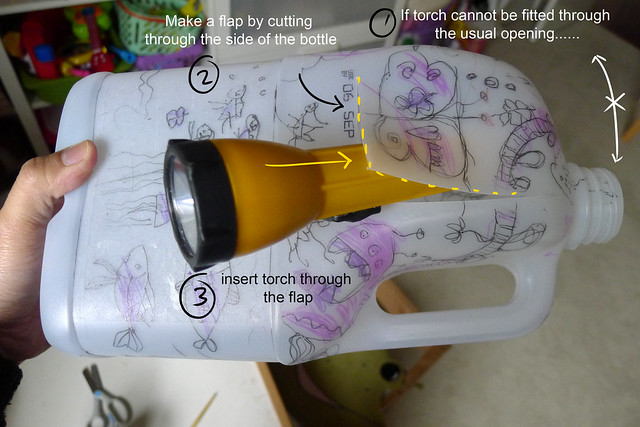
- Try to get a torch that fits through the bottle’s mouth. If yours does, all you have to do is to modify the bottle’s cap to hold the torch. Alternatively if you handy with basic wiring, you may think about using some fairy lights.
- Mine’s unable to fit so it had to be inserted via a small flap made on the side of the bottle.
- To make a handle for kiddo, simply tie a piece of twine to one end of a chopstick and tie the other end of the twine to the torch. Make sure kiddo has ready access to the on/off switch on the torch.
2. BBM’s Lantern
- Make a slit through the bottom of the bottle. Cut just halfway round the bottom.
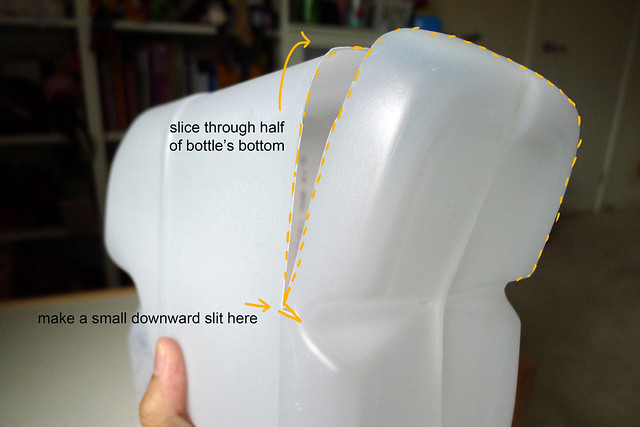
- Remember to make a small slit near the centre mark on both sides of the bottle. This allows you to bend the cut portion to install the tea candle holder & light the candle later.
- Remove the candle from its foil holder. Make a small incision on the bottom of the foil holder.
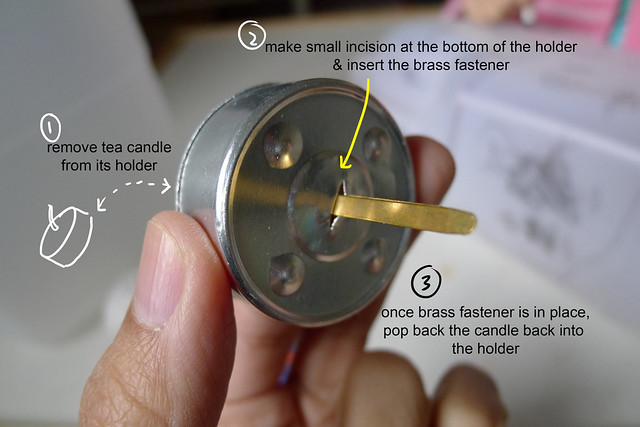
- Make a small incision at the centre bottom of the bottle.
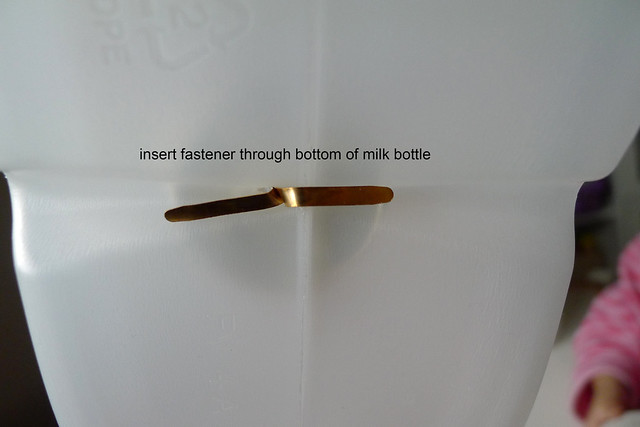
- Insert a brass fastener through the foil holder and the bottom of the bottle. Pull and fasten, then pop the candle back into the holder.
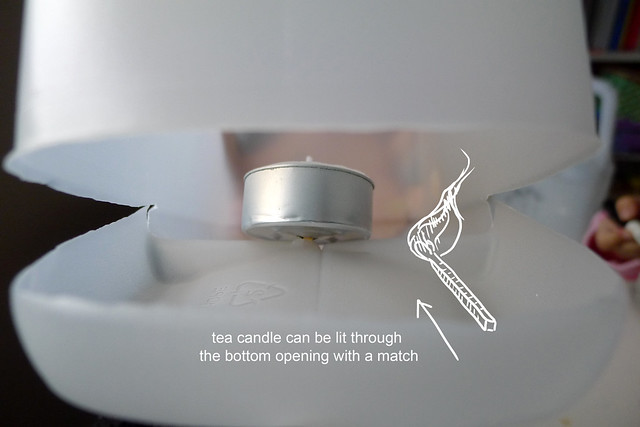
- REMOVE THE BOTTLE CAP and try lighting up a candle from the bottom for a quick test.
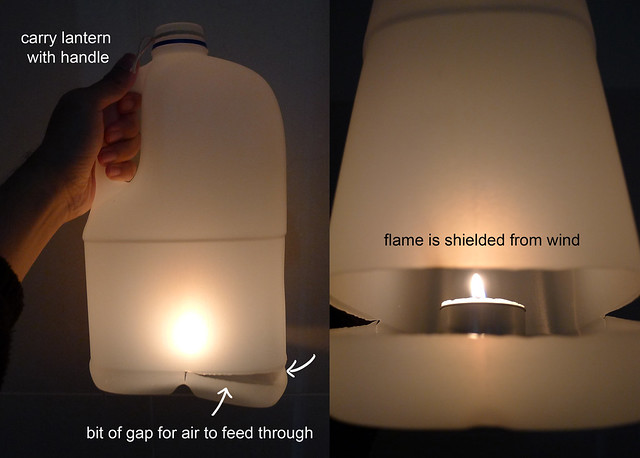
- The flame from the tea candle is small so it should not generate too much heat. In fact the handle of the milk bottle should be lukewarm and feels ok to be used to carry the lantern around. Do exercise discretion since flame is involved. You can extinguish the flame by simply blowing through the mouth of the bottle.
- You may also tie up twine and a chopstick around the open mouth of the bottle if you prefer to carry it this way.
- Next, simply grab a pen and doodle away! Happy Mid-Autumn Festival!