
Kaleidoscopes

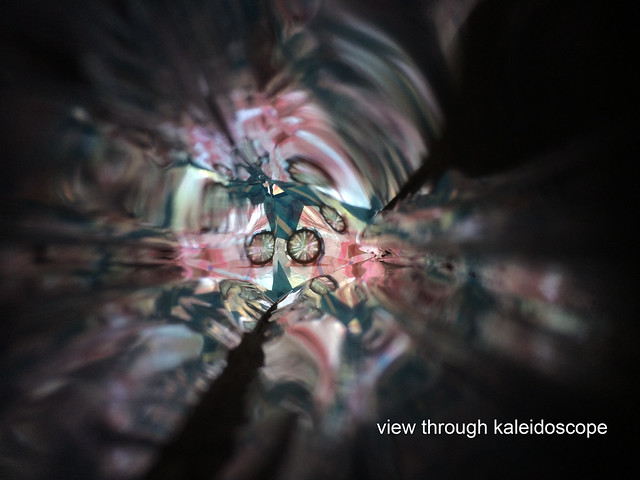
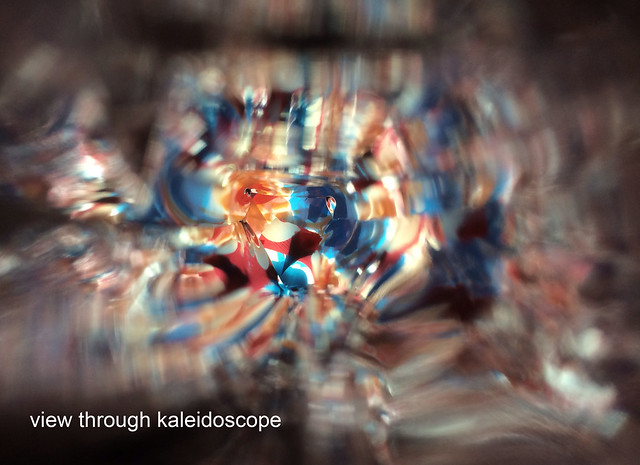
Pinkxi has learnt some everyday science since she started prep last year. BBM is pleasantly surprised whenever she blurts out nuggets of scientific knowledge that she’d picked up. During their recent trip down the neighbourhood op-shop, Pinkxi picked up a book on kaleidoscopes and proudly exclaimed to BBM, ‘Do you know light travels from outside into the tube and into our eyes, and that’s why we see colourful patterns?’. BBM was quite impressed to say the least (kudos to her teachers!).
While the book looked fairly dated, there were enough pictures in there to get her fired up, determined to go home and (have BBM help) make one. BBM thought it was a good opportunity to impart another nugget of info on light and reflection while getting his table messy…after all it’s been a while since the last DIY toy post.
What you need are:
- toilet roll/ cardboard tube of various diameters
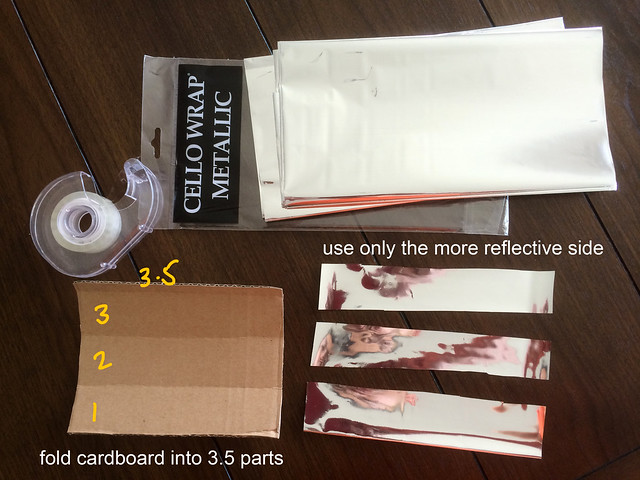
- mirror cards/ cards with reflective surface (aluminum foil won’t do). we stuck reflective cello-wrap onto cardboard for this exercise
- sticky tape
- scissors/cutters
- coloured cellophane paper or coloured plastic bags
- lids of takeaway clear plastic containers
- chopstick
- permanent markers (of different colours)
- ice cream stick
- rubber bands
- crayons and markers (to decorate exterior of kaleidoscopes)
- scissors/cutters
Instructions:
Version 1 – this has an external turning wheel that can be interchanged
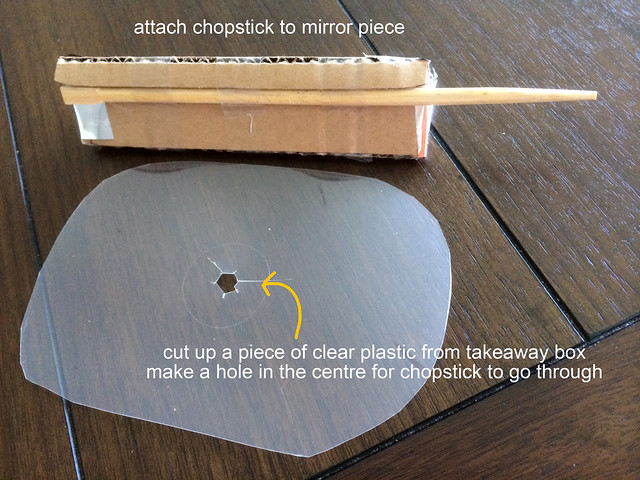
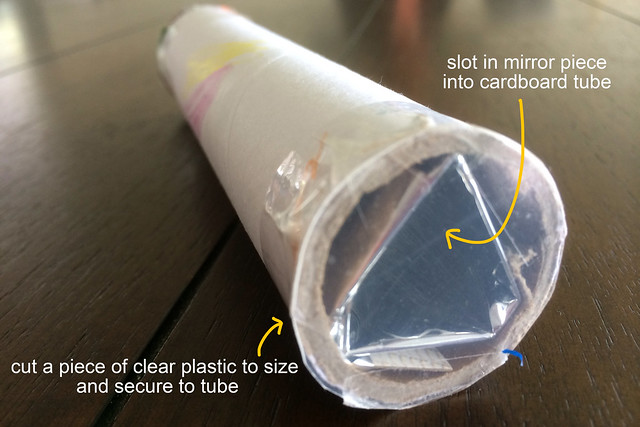
- To make a mirror piece, cut up a piece of cardboard that is of similar length to a cardboard tube. This cardboard tube will double up as your handle.
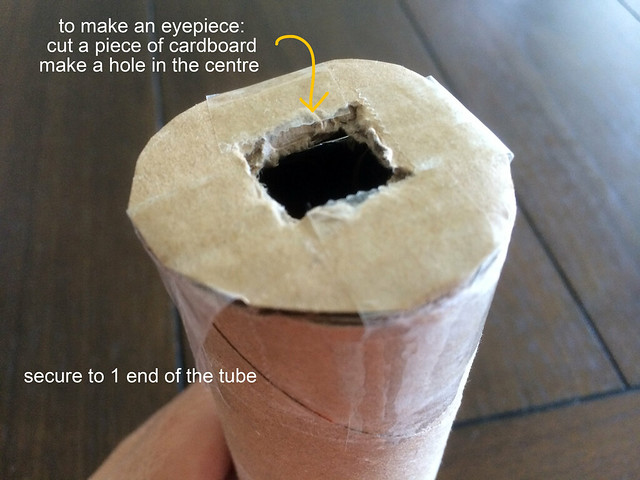
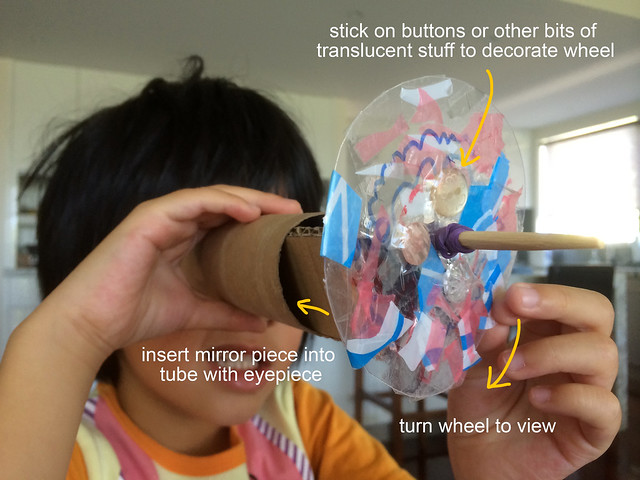
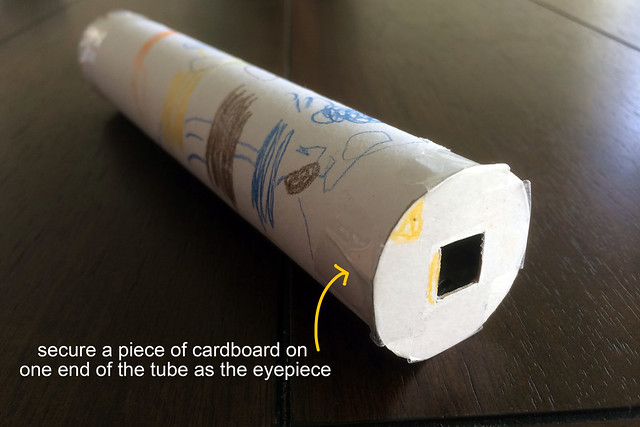
- Cut a smaller piece of round cardboard with a hole in the centre. This will be the eyepiece. Secure it to one end of the tube.
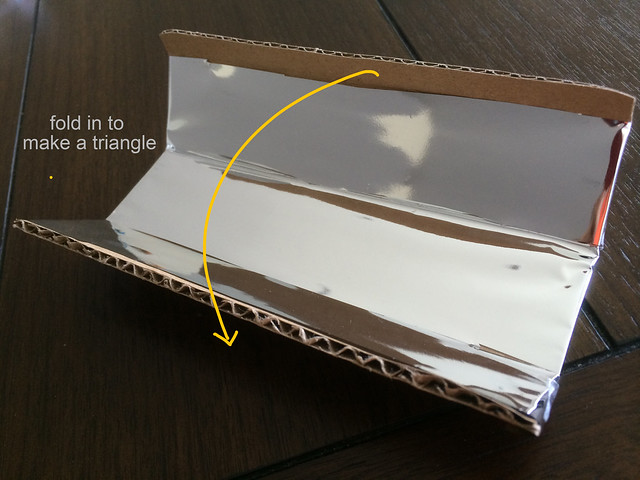
- Fold the cardboard (width-wise) into 3.5 parts. It has to fold into a triangle that fits snugly into the tube.
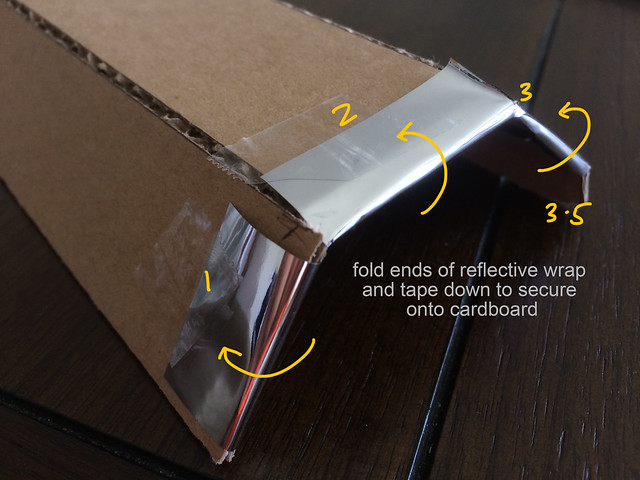
- Cut up strips of mirror cards and stick them onto the insides of the triangle. If that is hard to come by, a cheaper and more convenient alternative is to use reflective cellowrap. The results is not quite as reflective but it’s still pretty darn good. Do not use aluminum foil cos that does not work.
- If using cellowrap, make sure it is taut and secured only at both ends of the strips. This will maximise the reflective quality and not create any ‘bumps’ from the adhesive between the wrap and the cardboard.
- Secure a chopstick to the mirror piece.
- Cut up a piece of clear plastic from a takeaway container lid and cut a hole in the centre. This will act as the wheel which decorative stuff can be drawn/stuck on.
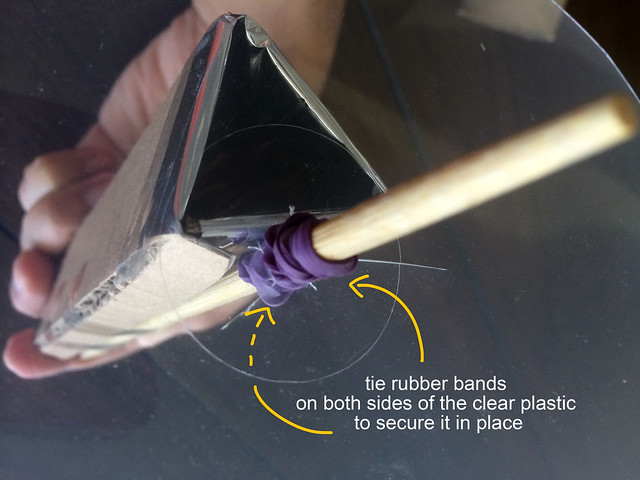
- Tie rubber bands on each side of the wheel to secure it in place. It should not wobble and should turn nicely round the chopstick.
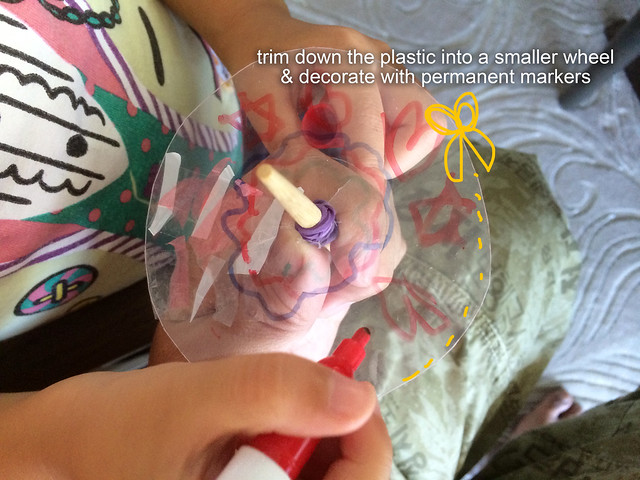
- Decorate the wheel by colouring/pasting it and trim it down to size if required.

- Insert mirror piece (with wheel attached) into the tube/handle.
- Version 1 complete! You can create additional decorated plastic wheels and interchange with this kaleidoscope.
Version 2 – this is a removable lens portion which allows you to change your decorative bits
- The mirror piece is basically done in the same manner as Version 1.
- Insert mirror piece into the tube/handle.
- Cut up a plastic piece to act as a cover to the mirror piece. Secure this to the other end of the tube. This will prevent the decorative bits from falling into the mirror piece.
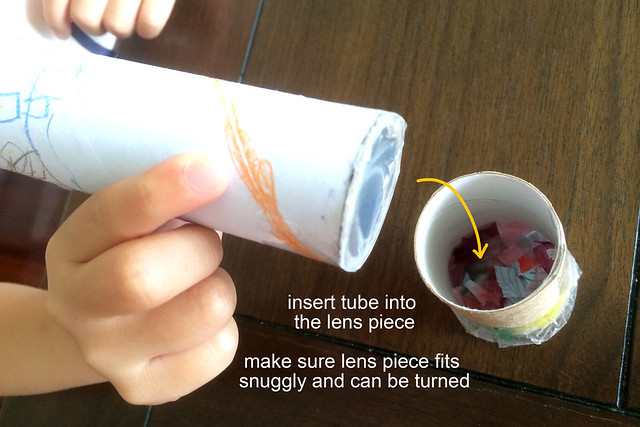
- Create a lens portion by cutting up and trimming a separate cardboard tube/toilet roll to fit the handle tube.
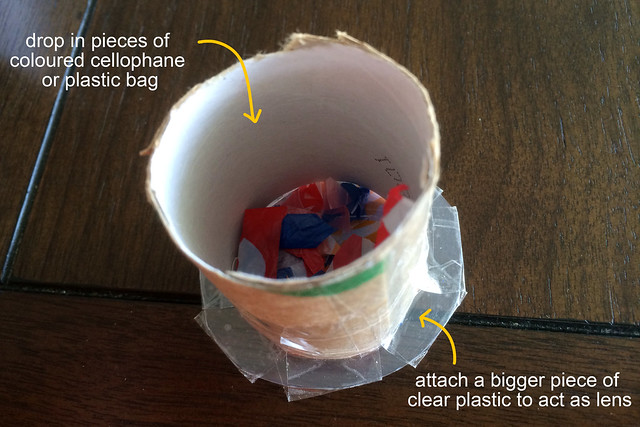
- Cut up another plastic piece (with slightly larger diameter) and attach that to the lens tube.
- Add decorative plastic cellophane / translucent bits into the lens piece.
- Insert mirror tube/handle into the lens piece. The lens piece should fit snugly into the tube.
- Version 2 complete! The good thing about this is that the lens piece can be easily removed and decorative bits changed.

You guys can also read up more about kaleidoscopes from tons of links online. Try this is you have time to spare. 🙂